How to Set Background Changer In Unity
Unity background changer is compatible with face filters and supports multi-face tracking. You can build cross-platform games with face tracking, video chats, and augmented reality apps in Unity or even use this feature for mixed reality projects.
Unity Chroma Key vs Background Subtraction
Unity-based chroma key needs a physical green screen behind a person. The chroma key shader then picks and removes a specific color from the background which is usually green. Developers need to avoid colors that match the skin tone so it won’t blend into the background.
Unlike Unity chroma key shader, the background segmentation uses a neural network that recognizes not the color but the area which belongs to the person and background. It enables a background removal feature that works automatically, in real-time, and requires just a camera.
For example, Banuba's Unity Face AR SDK. It is a cross-platform augmented reality-based platform that supports background subtraction in Unity. The kit allows developers to create Unity apps with a real-time background changing feature.
The background remover works automatically and doesn't require a physical green screen. You can use it as an alternative to Unity-based chroma key solutions when you need to replace and animate backgrounds for the selfie mobile or web camera.

Background Subtraction for Unity: Step-by-Step Guide
To test and integrate the background changer in your Unity app, you need to:
1. Get the latest trial version of Banuba Face AR SDK
Submit the website form and get a 14-day free trial to test the SDK's functionality inside out. Along with the background subtraction technology, the development kit also provides AR-powered face filters. Similar to Unity Asset Store, Banuba offers over 1,000 ready-made real-time and post-processing filters on Asset Store.

2. Download the files to compile or integrate
Download the SDK's source files to compile the Demo application or integrate the pre-made modules with the Unity background changing feature and AR-enabled face filters right into your project.
3. Activate the token
Once you're all set with the source files, you need to get and activate a client token - a unique identifier. Follow these instructions to activate it.
4. Enable the background segmentation feature
Follow the step-by-step guide to activate full-featured background subtraction capabilities in your Unity project.
Adding image as a background
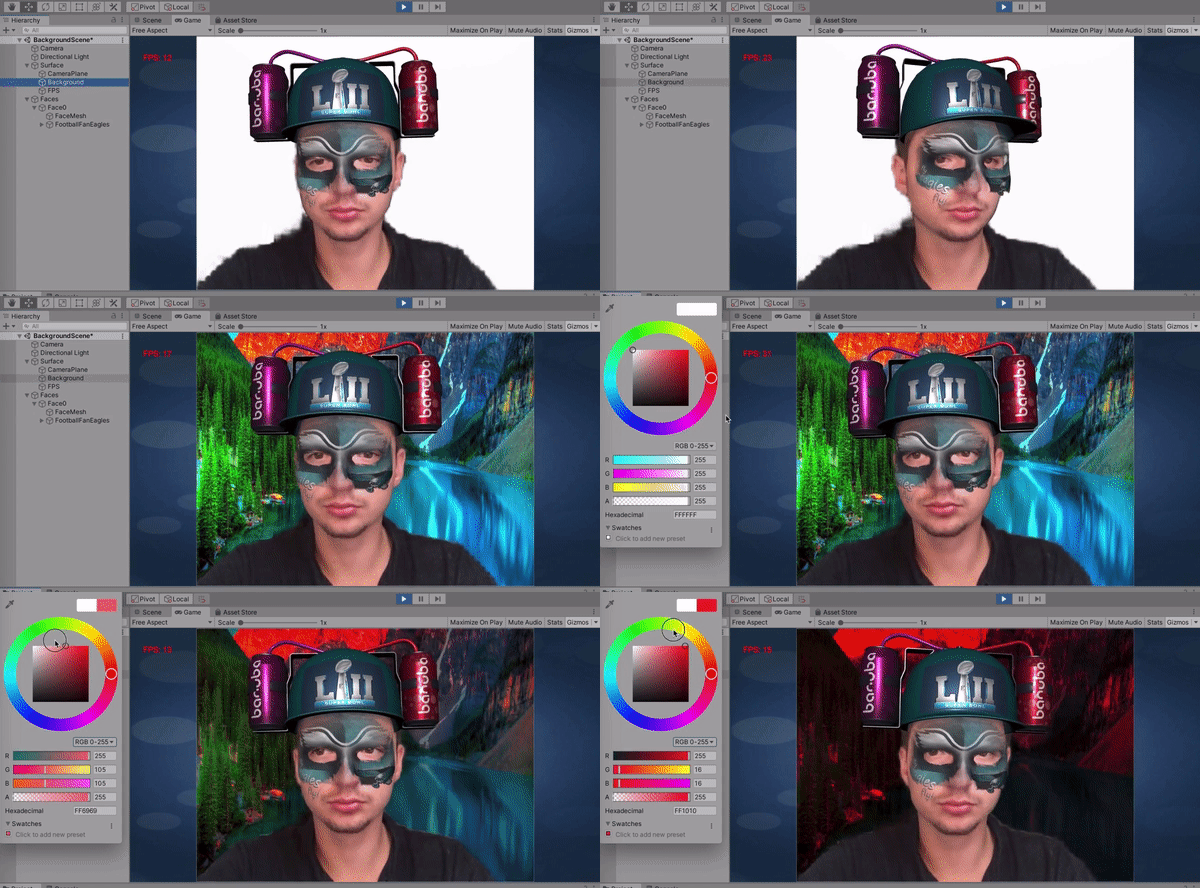 Adding image as a background
- Add texture and video to the project assets
- Run the project and add texture to Background -> Raw Image -> Texture field
Adding video as background
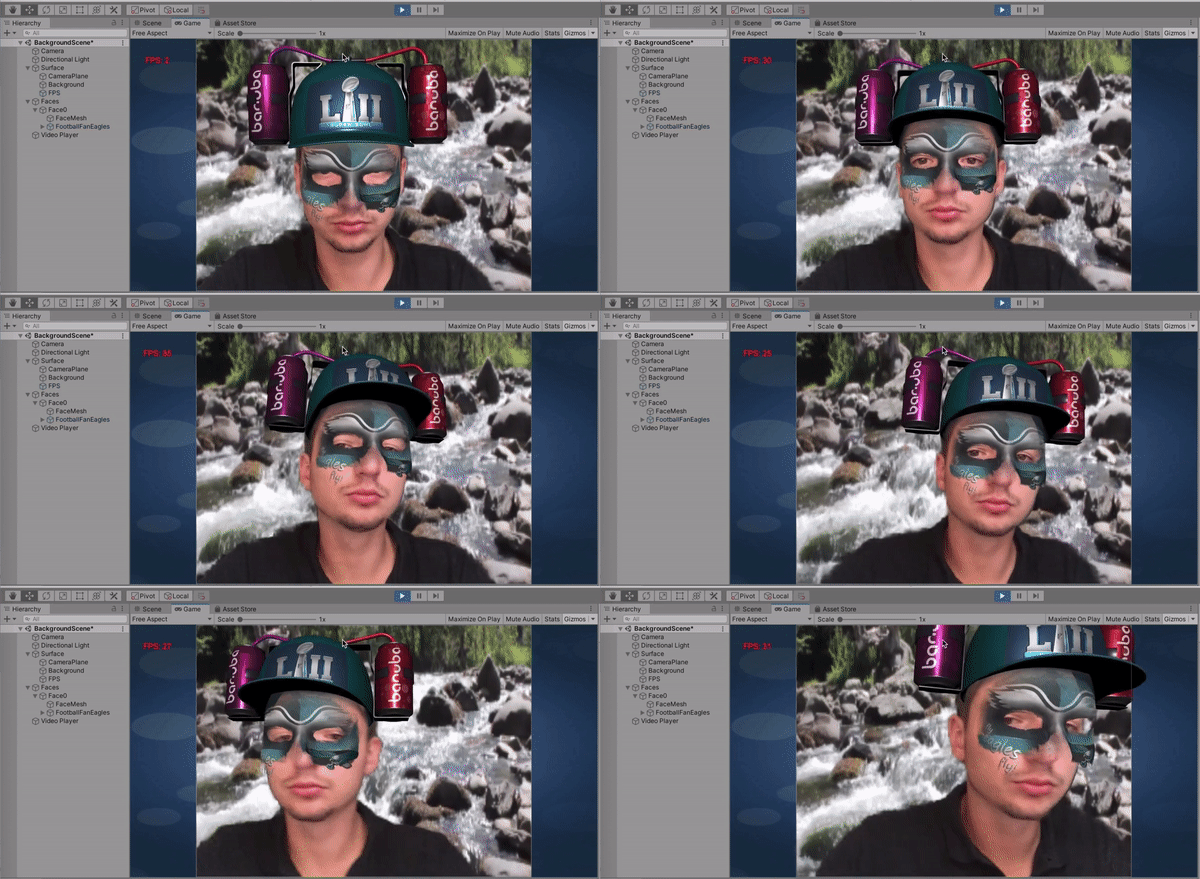 Adding video as background
- Add video player object to the root of the scene
- Add your video file to the Video Player-> Video Clip field
- Create new Render Texture in the project assets
- Add created Render Texture to the Target Texture field
- In the Video Player set the field Aspect Ration to the Stretch
- Add created Render Texture to the Background->Raw Image-> Texture field
- Change some parameters of Render Texture: Anti-aliasing - at least 2 samples and Wrap - Repeat
- Run the Project


 Adding image as a background
 Adding video as background